 Loading... Please wait...
Categories


The R4 3DS Newsletter
- Home
- How To Put Games On Your R4 3DS
How To Put Games On Your R4 3DS
While veteran users of the R4 3DS Flashcard may know the steps we're listing below, there are a lot of new R4 owners out there that just received their cards, and requested we do a quick step by step tutorial on how exactly they are able to put their games on the R4 so that they can use them in their Nintendo hand held.
The steps below cover virtually all types of 3DS flashcards, and the tutorial is the same whether you're using your card in a DS, DS Lite, DSi, DSi XL, or the new Nintendo 2DS systems.
Most games, whether they are hombrew / freeware or otherwise, all end in the .nds extension. The .nds extension means that they are compatible with the Nintendo 3DS Xl and Nintend DS, DSi systems. You'll need to get the rom files in this .nds format in order to be able to use them on your Nintendo 3DS and R4 3DS Card.
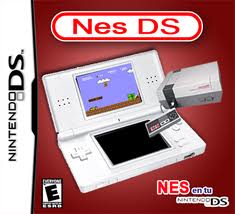
Let's use the nesDS emulator as an example. nesDS is a Nintendo Entertainment System emulator for the R4 3DS and Nintendo 3DS / 3DS XL systems. You can download it from our 3DS Homebrew section It allows you to play NES games on your new Nintendo 3DS systems. NesDS is an application, but regardless of whether it is a game or an app, the file extension for any DS or Nintendo 3DS homebrew is always followed by .nds
In the case of NesDS, when you download the freeware emulator, you will receive it archived or compressed in either .zip or .rar format. For you to be able to use it on your Nintendo 3DS and R4 3DS card, you'll need to use some software like the freeware 7zip or winRar in order to decompress / extract the file.
Once you have the file extracted, it will most certainly be in a folder on your PC or MAC with the exact same name as the archive itself. You'll want to go in to this folder, and see the two files present there. In the case of nesDS there are actually 2 files you will copy over.

Most homebrew or games you download won't have an additional .ini file or any other file, though sometimes you may even have an additional directory or folder that you have to copy over to the micro sd card. for NesDS, you need to copy both the nesds.ini file as well as the nesds.nds file over to the micro sd card you are using in our r4. You would normally put them in to the root directory of your micro sd, unless there are instructions to place them in a separate folder of some sort.
If we take an actual game example, like the very impressive WarHawk homebrew shooter. When you download the game in ZIP or RAR format, it will extract to a folder called Warhawk. Within that folder you'll find several files, but only the file with the .NDS extension is needed. The other files are a readme and a picture of the game cover itself.

This is the file you will need to drag and drop / copy and paste over to your micro SD card. Once again, in the root directory, or if you prefer, you can create folders to keep things organized. A folder for GAMES or APPS helps keep the micro SD card tidy and you may have an easier time finding your games and your apps that way.
And that is all there is to it. The only thing left for you to do is to put that micro SD card in to your R4 3DS, and plug it in to your hand held system and start playing some amazing homebrew games and applications on your Nintendo 3DS XL!
All prices are in USD. Copyright 2024 R4 3DS. Sitemap | Terms And Conditions / Privacy Policy | Shipping And Returns | R4 3DS Affiliate Program


All prices on our website will be processed in US Dollars. We do offer some currencies as a selection for reference purposes but the final price will be charged based on our US Dollar pricing. Please note that exchange rates can change every day - sometimes many times per day, and that your final amount will always be charged in US Dollars. By completing your order you agree to the US dollar charge and the equivalent amount based on the exchange rate at the time of processing.
Please note that our Buy 2 Get 1 Free Promotion Does Not Include Micro SD Cards. In orders where you purchase a combo package with a micro SD Card, only the R4 cards themselves are eligable for the Buy 2 Get 1 Free or Buy 1 Get 1 FREE Promotion. Please note that our buy 2 get 1 free promotion is NOT applicable with orders where bulk or quanrtity discounts are in place. A Maximum of 10 Free R4 Cards in total will be shipped with your order. Wholesale orders are not part of the buy 2 get 1 free promotion due to the discount / wholesale pricing